Add Characters
You can add custom characters and set as your partner character.
Basic
1. Prepare Character Pictures
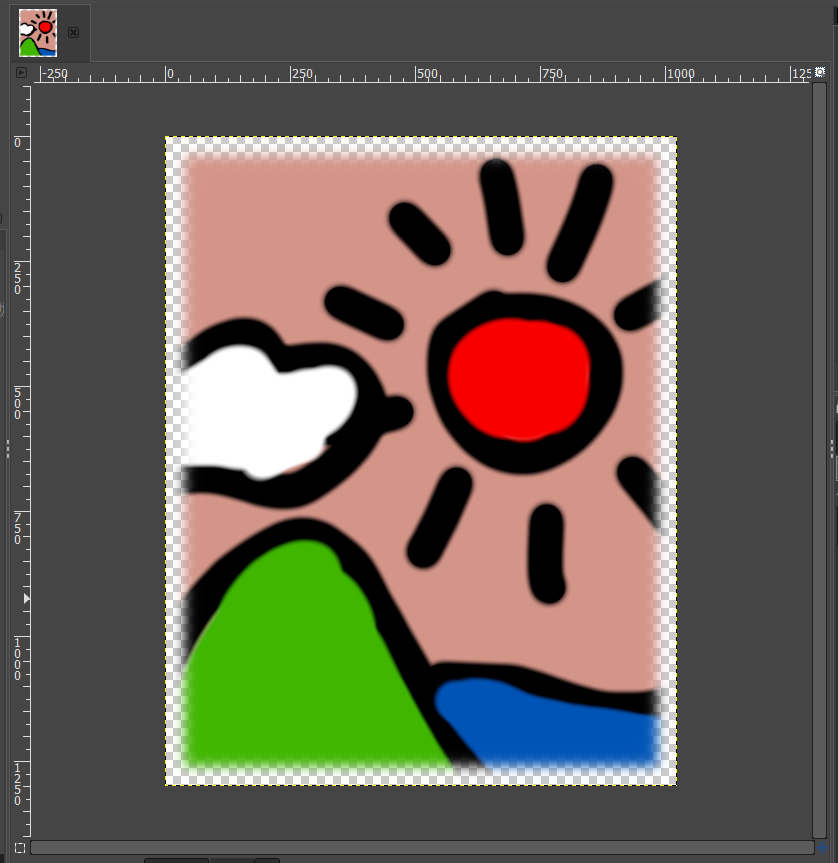
First, edit one character picture and prepare the following 3 type images from it. Transparent background is recommended.
| File Name | Resolution | Purpose |
|---|---|---|
| image_0_lg.png | 1024x1300 | Full view |
| image_0_md.png | 420x295 | Thumbnail |
| image_0_sm.png | 128x128 | Icon |
A full view image will get to looks better when apply edge fade effect.
How to
2. Prepare Character
- Copy the above text and paste your text editor like notepad then save as
meta.txtin UTF-8. - Replace parts of the pasted text like the following:
<def_skill_id>Default skill ID (If use "No Skill", set to empty)<chara_name>Character name<illustrator>Illustrator (optional)
- Save again.
Example: character name: うに, illustrator: inonote, no default skill
3. Put Files
Create a folder named you want and put the prepared three images and meta.txt in it. Then, put the character folder like the following:
[Game Folder]
├ UMIGURI.exe
└ data
  └ characters
    ├ <Group Name>
    │  ├ <Character Folder>
    │  │  ├ image_0_lg.png
    │  │  ├ image_0_md.png
    │  │  ├ image_0_sm.png
    │  │  └ meta.txt
    │  ⋮
    ⋮
4. Done
It's ok if you can see your new characters in the character select screen.
Transform - Extra Pictures
1. Prepare Extra Pictures
Prepare image_X_lg.png、image_X_md.png、image_X_sm.png (X is an index starting at 1) referencing the above, Prepare Character Pictures, and put them in a character folder you want to add.
For example, if added 2 type images, a character folder contains like this:
<Character folder>
  ├ image_0_lg.png
  ├ image_0_md.png
  ├ image_0_sm.png
  ├ image_1_lg.png    (←added image)
  ├ image_1_md.png    (←added image)
  ├ image_1_sm.png    (←added image)
  ├ image_2_lg.png    (←added image)
  ├ image_2_md.png    (←added image)
  ├ image_2_sm.png    (←added image)
  └ meta.txt
2. Append into meta.txt
Open meta.txt and append Variation lines you want to add, then overwrite. You can change a character name and an illustrator name per picture.
Example: image_0* character name: うに, image_1* character name: うに/実写, image_2* character name: うに/擬人化
3. Done
It's ok if you can see your new character pictures in the character transform screen.
Extra
You can create special skills to change picture by selecting one.
Read how to create skills
Apply Edge Fade to Image
This explanation is for GIMP, but other software are roughly similar to it.
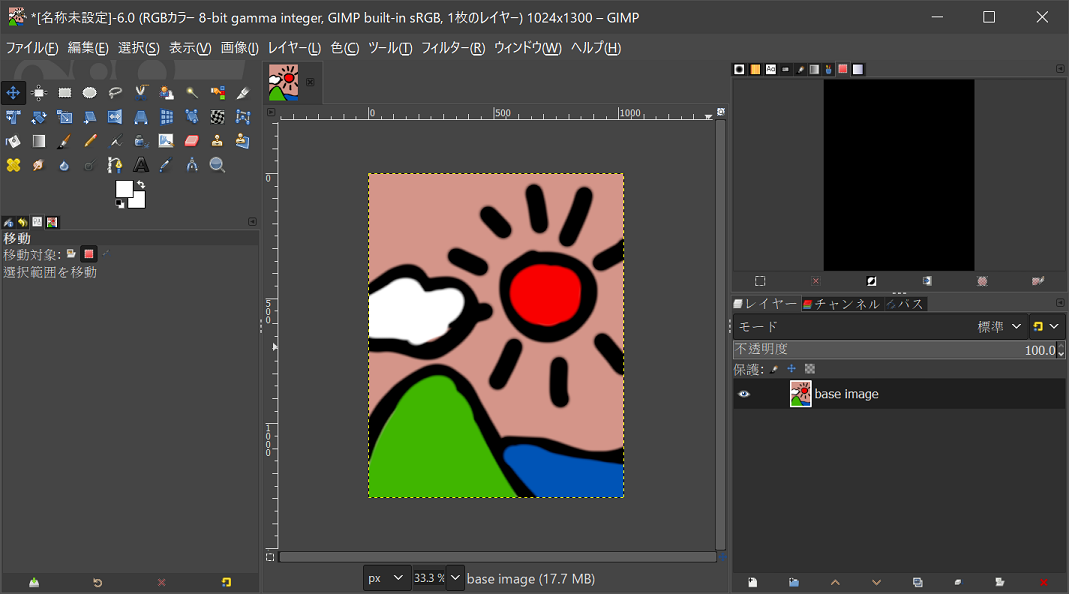
1. Open Original Image
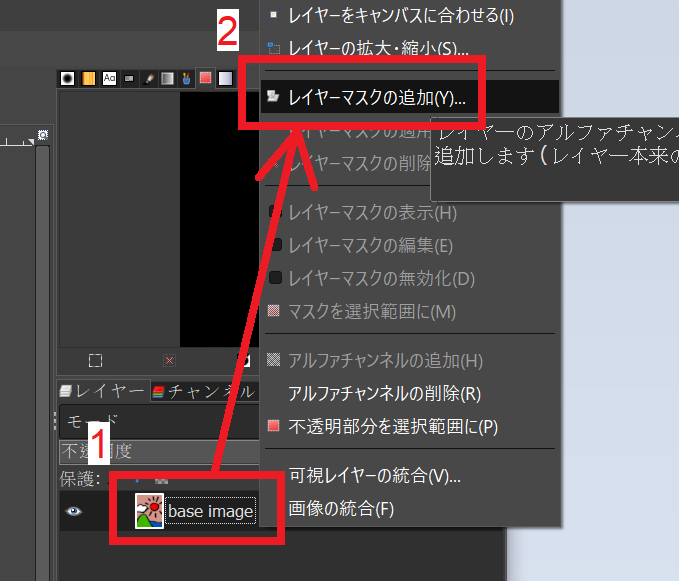
2. Add Layer Mask
Right-click the original layer and click Add Layer Mask. Then click Add.
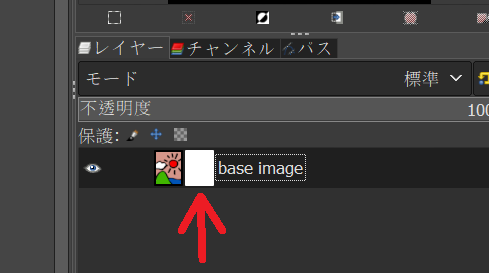
3. Switch Edit Target to Layer Mask
Click the right one of two thumbnails displayed on the original layer.
4. Copy Fade Material
Open the fade material, Game Folder/data/chara/lg_alpha.png, with paint software and copy all.
5. Paste and Overwrite Fade Material
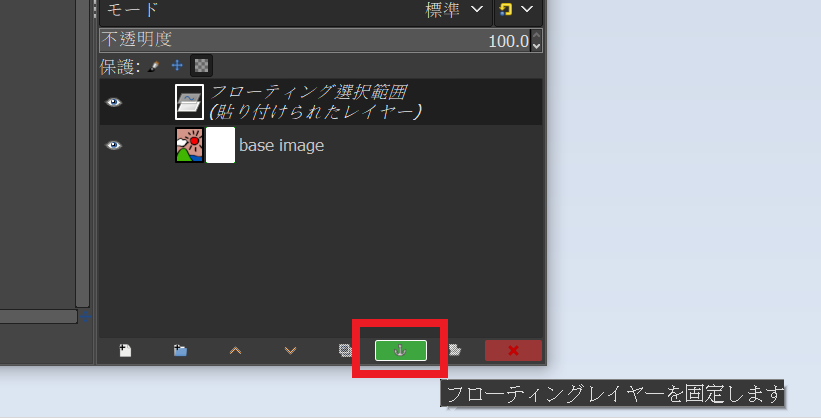
Back to the window opened the original image and click Edit > Paste in the menu. Then click Anchor a Floating Selection icon.
6. Apply Layer Mask
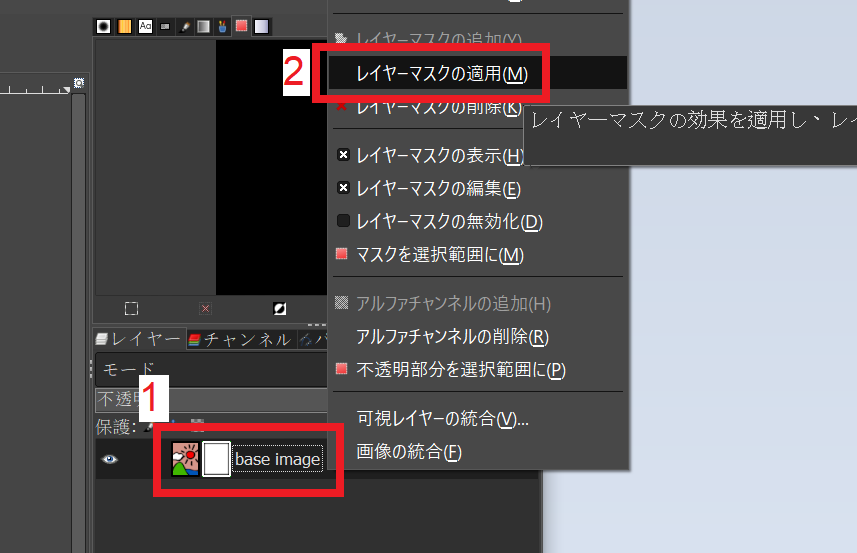
Right-click the original layer and click Apply Layer Mask.
7. Done
Done. Click File > Export As to save your editted image.